Omelets Recipe: Simple and Customizable

An omelet serves as a culinary blank canvas, starting with basic ingredients but offering endless possibilities. Achieving the perfect balance of fluffiness and flavor involves mastering foundational steps like whisking eggs, melting butter, and precise folding.
Consider how the right combination of fillings can elevate an ordinary breakfast into something memorable. By mastering these essential techniques, you can transform your morning routine into a delightful ritual.
Key Takeaways
- Whisk eggs, milk, salt, and pepper for a uniform omelet base.
- Use an 8-inch non-stick skillet for a perfect 3-egg omelet.
- Cook over medium heat to maintain a fluffy, soft texture.
- Customize with pre-prepared fillings for a personal touch.
- Practice enhances skill and allows experimentation with flavors.
Recipe
An omelet is a delicious and straightforward breakfast option that can be customized with your favorite fillings or enjoyed plain. It offers a delightful combination of flavors and a satisfying texture that makes it a popular choice for breakfast enthusiasts. The key to making a perfect omelet lies in achieving a fluffy, soft texture without overcooking or browning the eggs.
To prepare a classic omelet, you'll need a few basic ingredients such as eggs, butter, milk, salt, and pepper. These ingredients come together to create a smooth and creamy egg mixture that cooks evenly. Using the right technique and tools, like a non-stick pan and a spatula, will ensure your omelet turns out perfectly every time.
Ingredients:
- 3 large eggs
- 2 tablespoons butter
- 1/4 cup milk
- 1/4 teaspoon salt
- 1/8 teaspoon black pepper
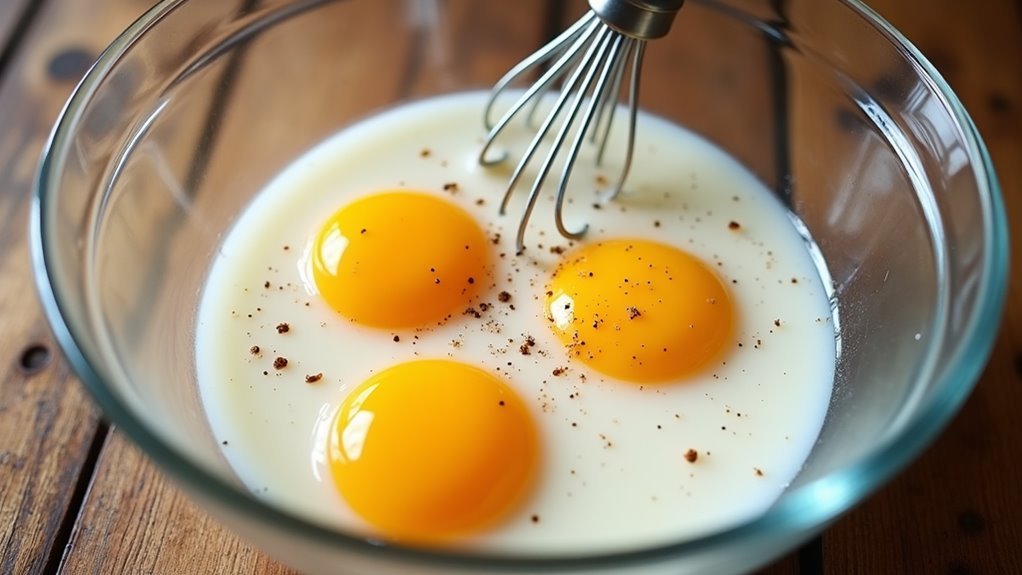
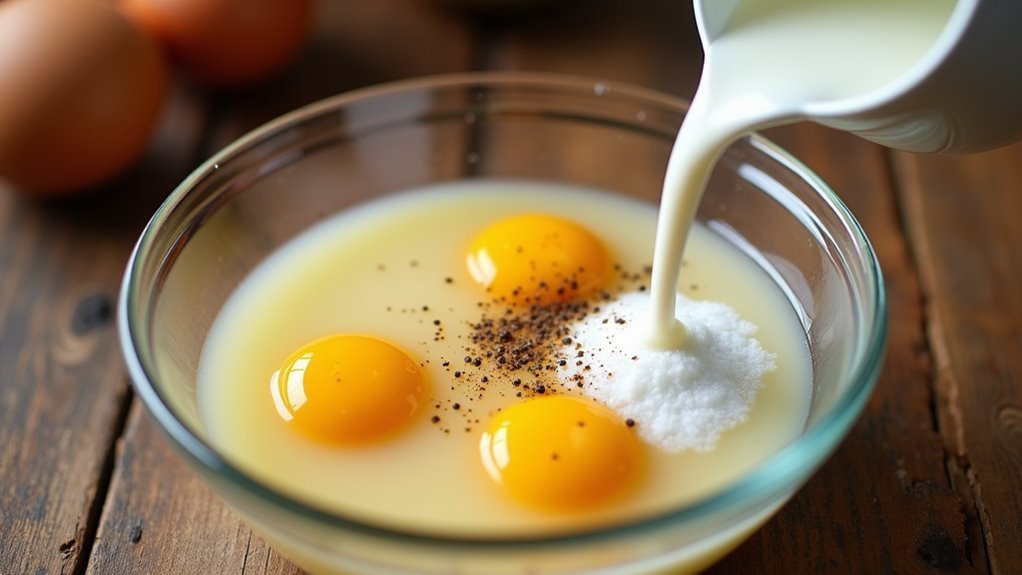
To start, whisk the eggs, milk, salt, and pepper in a bowl until they're well combined and a uniform mixture is formed.
Heat the butter in an 8-inch non-stick pan over medium heat, allowing it to melt and the bubbling to subside. Pour the egg mixture into the pan and tilt it to spread the eggs evenly across the surface. As the eggs start to set, use a spatula to gently push the cooked edges toward the center, allowing the uncooked egg to flow to the sides.
When the eggs are almost set but still slightly wet on top, fold one side over the other to form a half-moon shape. Slide the omelet onto a plate and serve immediately.
For the best results, ensure that your eggs are at room temperature before you begin. Never use high heat, as it can make the eggs tough and rubbery. The size of the pan matters, too; an 8-inch non-stick skillet is ideal for a 3-egg omelet.
If you plan to add fillings, prepare them in advance and keep them warm, as cold fillings can interfere with the cooking process and prevent the eggs from setting properly.
Cooking Steps
You're about to create a delicious omelet, and it all starts with whisking your eggs together with a touch of salt and pepper.
Melt butter in a skillet until it's bubbly, then pour in the egg mixture, ensuring it spreads evenly across the pan.
As the edges set, gently push them towards the center, and soon you'll fold your omelet into a delightful half-moon, ready to enjoy!
Step 1. Whisk Eggs With Seasoning
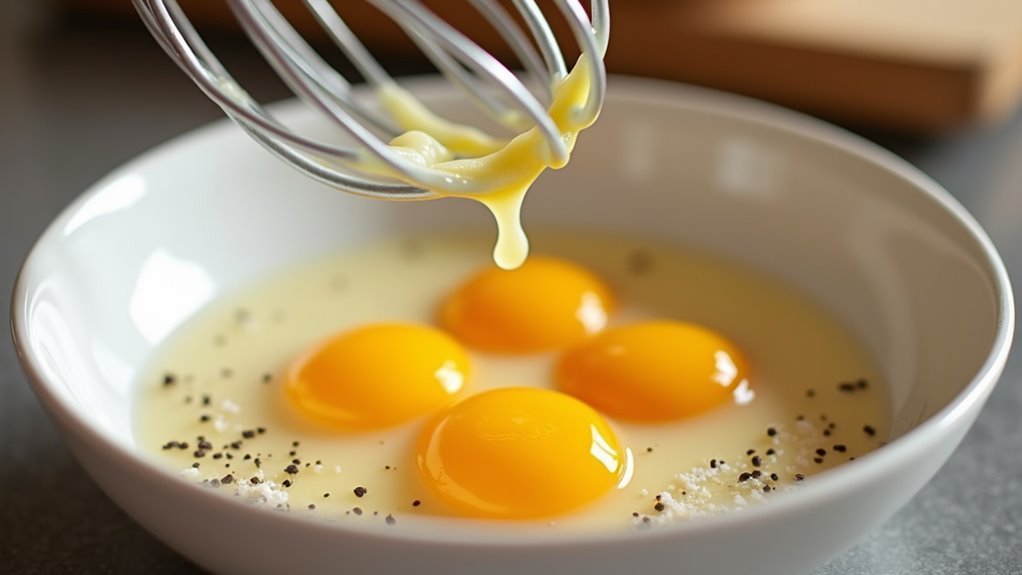
To start off with, grab a mixing bowl and whisk to begin combining your ingredients. Crack three large eggs into the bowl, feeling the satisfaction of each shell breaking.
Add 1/4 cup of milk to make your omelet light and fluffy. Sprinkle in 1/4 teaspoon of salt and 1/8 teaspoon of black pepper for that perfect balance of flavor.
Now, get whisking! Let your enthusiasm flow as you mix everything together, ensuring the yolks and whites are fully blended. This step is crucial to achieve that smooth, luscious texture.
Whisk until you see a uniform, pale yellow mixture, and enjoy the anticipation of creating something delicious. You're setting the stage for a delightful omelet experience!
Step 2. Melt Butter in Skillet
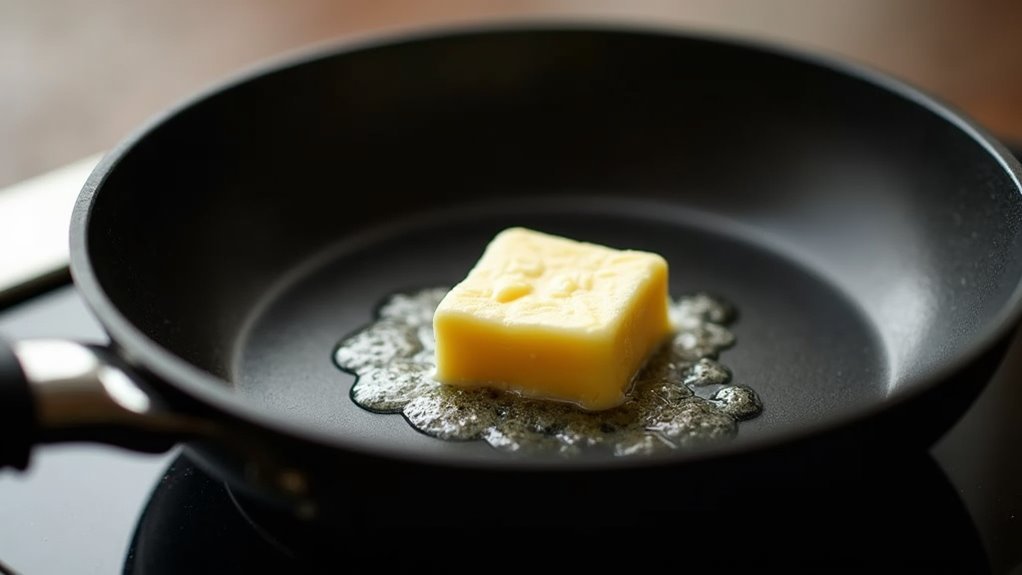
With your egg mixture ready, it's time to heat the skillet. Grab your trusty non-stick pan and place it over medium heat.
Now, drop in those two tablespoons of butter. Watch as it melts, filling your kitchen with the delightful aroma that signals something delicious is underway. Be patient, letting the butter melt completely, then wait for the bubbling to subside. This ensures your skillet is perfectly prepped for cooking.
As the butter coats the pan, it's setting the stage for your omelet to glide effortlessly, preventing any sticking. Keep an eye on the heat—medium is your friend here. You want the butter to be hot, but not burnt.
This step is crucial for achieving that soft, fluffy texture you're aiming for.
Step 3. Pour Eggs Into Pan
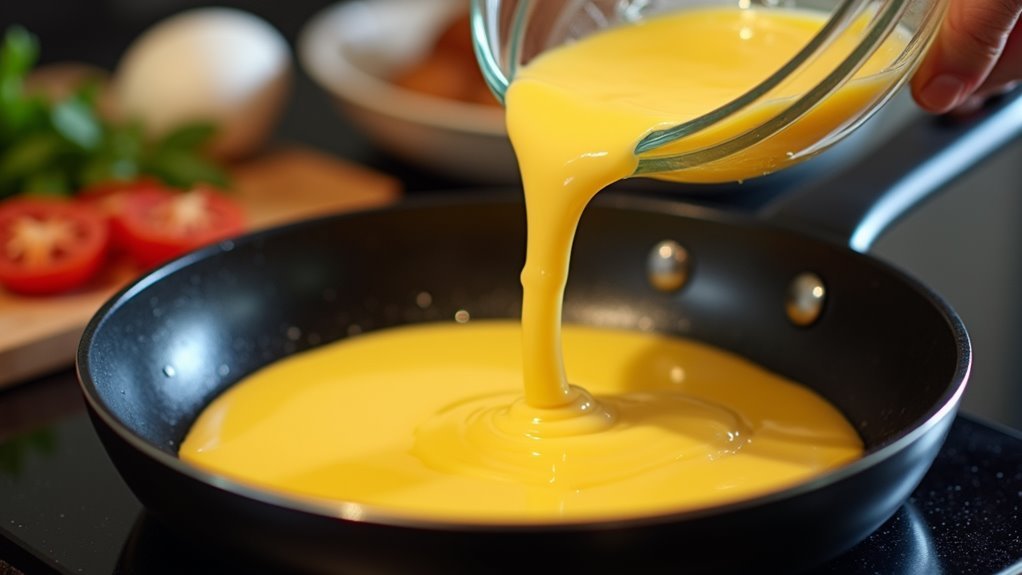
Once the butter has settled, pour your whisked egg mixture into the pan, ensuring an even spread across the surface. This step is crucial for a perfectly cooked omelet, as it sets the foundation for the entire dish.
As you pour, tilt the pan gently to help the eggs coat the bottom evenly. You'll notice the eggs starting to cook almost immediately, which is exactly what you want. The gentle sizzle and the vibrant yellow color are signs of a delicious omelet in the making.
Keep your focus on maintaining an even layer; this will ensure a soft, fluffy texture. Be patient, and resist the urge to stir, allowing the eggs to cook evenly and set beautifully.
Step 4. Push Edges Towards Center
As the eggs begin to set around the edges, gently push them towards the center of the pan with a spatula. This action creates an even layer, ensuring all parts cook perfectly.
You'll notice the uncooked eggs flow into the newly cleared space, filling it up and continuing to cook. It's a lovely process, revealing the transformation of simple eggs into a fluffy masterpiece.
Don't rush; keep your movements gentle and steady, allowing the eggs to set gradually. This step is crucial for a tender omelet, so embrace the process.
Enjoy watching the eggs change under your care, inviting you to be part of this delightful kitchen ritual. Soon, you'll have a perfectly cooked base ready for your omelet.
Step 5. Fold Omelet Into Half-Moon
The moment has arrived to transform your fluffy egg base into a classic omelet shape. With the eggs nearly set but still slightly wet on top, grab your trusty spatula.
Gently lift one side of the omelet, folding it over to meet the other side in a graceful half-moon. Feel the joy as your creation takes form, showcasing your newfound skills!
This simple fold not only enhances presentation but also ensures even cooking.
Tilting the pan slightly can help slide the omelet onto your spatula smoothly. Be gentle, ensuring your masterpiece stays intact.
Serve immediately to savor the warm, soft texture. You've just crafted an omelet that's ready to impress, perfect for any meal of the day!
Final Thoughts
When it comes to perfecting your omelet-making skills, practice truly makes perfect. You'll find that each attempt brings you closer to mastering this versatile dish.
Don't be afraid to experiment with different fillings and flavors to keep things exciting. Remember, an omelet isn't just breakfast; it can be a delightful meal any time of day.
Keep your ingredients fresh and your enthusiasm high. The more you cook, the more confident you'll become, and soon, creating the perfect omelet will feel like second nature.
Share your creations with friends and family, spreading the joy of a well-made omelet. Embrace the process, celebrate your progress, and enjoy every delicious bite of your homemade masterpiece.
Happy cooking!
Frequently Asked Questions
Can I Use Egg Substitutes for a Dairy-Free Omelet?
Imagine crafting a delightful omelet without eggs! Yes, you can use egg substitutes for a dairy-free option.
Try chickpea flour or silken tofu, which mimic the texture and flavor of eggs. Mix chickpea flour with water, or blend silken tofu with seasonings, to achieve a batter-like consistency.
Cook just like a traditional omelet, savoring the magic of creativity in the kitchen. Dive into this culinary adventure, and enjoy a wholesome, delicious meal!
What Are Some Popular Omelet Filling Combinations?
You're in for a treat with these popular omelet fillings! Imagine biting into a classic cheese and ham combo, where cheddar melts into savory slices.
Craving veggies? Try spinach, mushrooms, and tomatoes for a fresh, vibrant taste.
Love a bit of spice? Toss in some jalapeños, pepper jack cheese, and salsa for a zesty kick.
These combinations are sure to elevate your omelet game and make breakfast a delightful experience!
How Can I Keep My Omelet From Sticking to the Pan?
To keep your omelet from sticking, make sure you use a good non-stick pan and preheat it over medium heat.
Add butter and wait until it melts and the bubbling subsides. This creates a slick surface for the eggs.
Ensure the pan isn't too hot—this prevents sticking and keeps the omelet tender.
Don't rush; let the eggs set slightly before gently moving them with a spatula.
Enjoy your cooking adventure!
Is It Possible to Make an Omelet in a Microwave?
Absolutely, you can microwave an omelet! Start by whisking your eggs, milk, salt, and pepper in a microwave-safe bowl.
Stir in your favorite fillings, then pop it in the microwave for about 1-2 minutes, stirring halfway.
Watch the magic as it morphs into a fluffy feast. Remember, every microwave varies, so keep an eye on it.
With minimal mess and quick cooking, you'll be savoring a speedy, scrumptious snack in no time!
How Do I Store Leftover Omelet?
Storing leftover omelet is easy and keeps it tasty for later!
Let it cool completely, then wrap it tightly in plastic wrap or place it in an airtight container.
Pop it in the fridge, and it'll stay good for up to two days.
When you're ready to enjoy it again, just reheat gently in a skillet or microwave.
This way, you'll savor every fluffy, flavorful bite just like when it was freshly made!