Easy Cheese Manicotti Recipe: Cheesy and Satisfying
For a dish that's both cheesy and satisfying, try the Easy Cheese Manicotti Recipe. This Italian-American classic uses just five ingredients to create a rich, cheesy filling inside tender pasta shells, all baked in a savory marinara sauce.
Perfect for busy evenings, it offers homemade goodness without the hassle. Imagine the aroma as the cheese bubbles and browns in your kitchen.
To achieve the perfect texture and flavor, there's a simple trick you might not expect.
Key Takeaways
- Use only five ingredients: manicotti shells, ricotta cheese, mozzarella cheese, marinara sauce, and an egg.
- Boil manicotti shells to al dente to prevent over-softening during baking.
- Fill shells with a creamy mixture of ricotta, mozzarella, and egg.
- Bake filled shells in marinara sauce at 375°F for 25-30 minutes.
- Let manicotti rest 5-10 minutes post-baking for optimal flavor and texture.
Recipe
Cheese manicotti is a delightful Italian-American dish that's both comforting and satisfying. This recipe simplifies the traditional version with only five ingredients, while still delivering all the delicious flavors and textures that make it a family favorite. The dish features tender pasta shells filled with a rich cheese mixture, all baked in a flavorful marinara sauce until golden and bubbling. Perfect for busy weeknight dinners or casual get-togethers, this manicotti can be prepared in advance and baked just before serving.
To create this dish, you'll start by boiling the manicotti shells until they're just al dente. Meanwhile, you'll prepare a creamy filling with ricotta cheese, mozzarella, and an egg. Once the pasta shells are cooled, they're filled with this cheese mixture, placed in a baking dish, covered with marinara sauce, and topped with additional mozzarella cheese before baking. The result is a deliciously cheesy and savory pasta dish that's sure to please everyone at the table.
Ingredients:
- 1 package (8 oz) manicotti shells
- 15 oz ricotta cheese
- 2 cups shredded mozzarella cheese
- 24 oz marinara sauce
- 1 large egg
To prepare cheese manicotti, begin by boiling the manicotti shells according to package directions, ensuring they're al dente. While the shells are cooking, mix together the ricotta cheese, half of the mozzarella cheese, and the egg in a bowl until well combined.
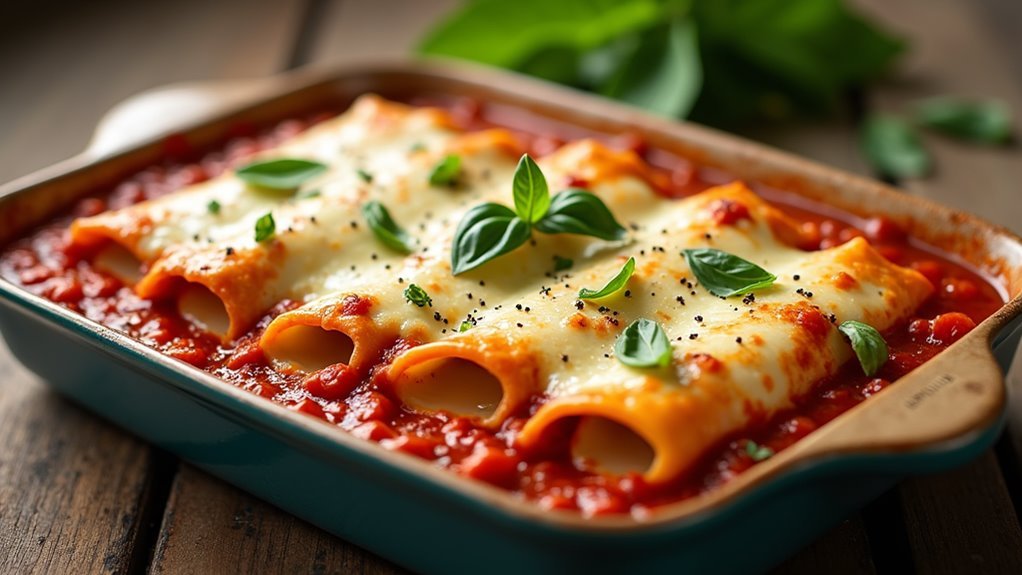
After draining and cooling the pasta shells, fill each one with the cheese mixture using a piping bag or spoon. Spread 1 cup of marinara sauce in a 9×13 baking dish, arrange the filled manicotti in a single layer, and top with the remaining marinara sauce and mozzarella cheese. Bake in a preheated oven at 375°F for 25-30 minutes until the cheese is melted and the sauce is bubbling.
For the best results, slightly undercook the pasta shells as they'll continue to cook during baking. You can make the cheese filling a day ahead and store it in the refrigerator to save time. If the marinara sauce seems too thick, add 1/4 cup of the pasta cooking water to achieve the desired consistency.
Allow the baked manicotti to rest for 5-10 minutes before serving to let the filling set, ensuring each bite is perfectly cheesy and delicious.
Cooking Steps
Let's get cooking with this delicious cheese manicotti recipe!
Start by boiling the manicotti shells until they're just al dente.
Then mix ricotta, mozzarella, and an egg to create a creamy filling bursting with flavor.
Fill the shells with this cheesy goodness, arrange them in a baking dish with marinara sauce, and bake until the cheese is bubbly and golden—your taste buds are in for a treat!
[DIRECTIONS]:
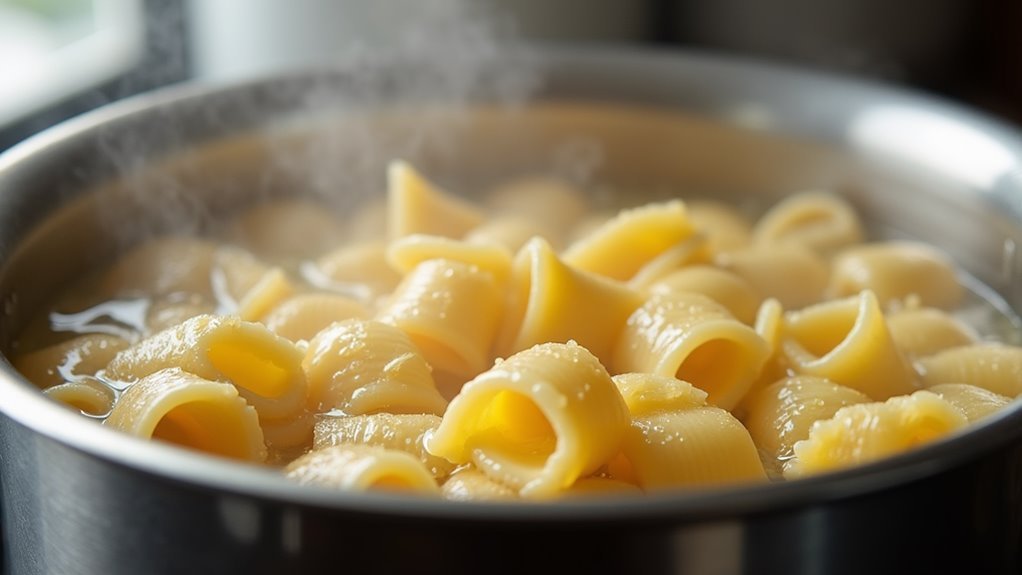
Step 1. Boil Manicotti Shells
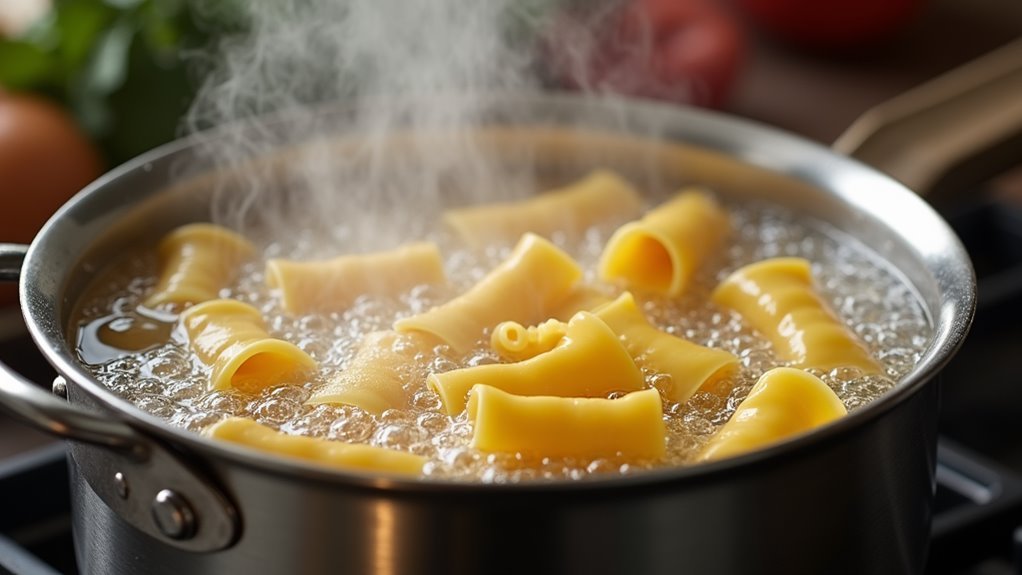
To begin your manicotti dish, the pasta shells require precise boiling. First, bring a large pot of salted water to a rolling boil.
Gently add the manicotti shells, ensuring they don't stick together. Stir occasionally and boil them according to package instructions until they're just al dente. This careful timing is crucial as the shells will continue to cook in the oven later.
Once done, drain them immediately and rinse with cold water to halt the cooking process, preventing them from becoming too soft.
Handling them with care, lay the shells out on a clean kitchen towel to dry. This step ensures they're ready to be filled with that delicious cheese mixture, setting the stage for a satisfying, cheesy meal!
Step 2. Mix Cheese and Egg Filling
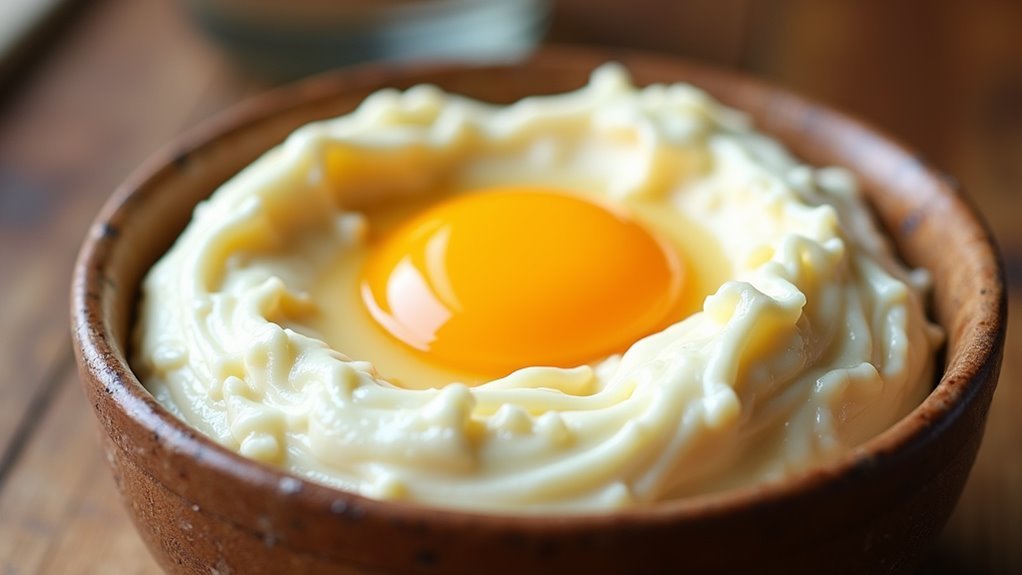
With the manicotti shells prepped and ready, turn your attention to crafting the luscious cheese filling.
In a mixing bowl, combine 15 ounces of creamy ricotta cheese with one large egg, stirring until smooth and well-blended.
Add in half of the shredded mozzarella cheese, about one cup, and mix thoroughly until you see a delightful, gooey consistency.
This mixture will be the heart of your dish, bringing a rich, velvety texture that contrasts beautifully with the pasta's firm bite.
The egg acts as a binder, ensuring each bite holds together perfectly.
Feel the excitement of creating something delicious, as this blend of flavors promises an irresistible taste that will have everyone at the table eager for more.
Step 3. Fill Shells With Cheese Mixture

Now that your cheese filling is ready, it's time to fill the manicotti shells. This is where the magic happens, transforming simple pasta into a cheesy masterpiece!
Gently hold each shell in your hand, taking care not to tear them. Use a piping bag for precision, or a spoon if you prefer, to fill each shell generously with the creamy cheese mixture.
If you're using a spoon, tilt the shell slightly and ease the filling in, ensuring it's packed but not overstuffed. Feel the satisfaction as each shell becomes a perfect vessel for deliciousness.
Don't rush; enjoy this part of the process. Each filled shell is a step closer to a comforting, cheesy dish that's sure to impress everyone at your table!
Step 4. Arrange Manicotti in Dish
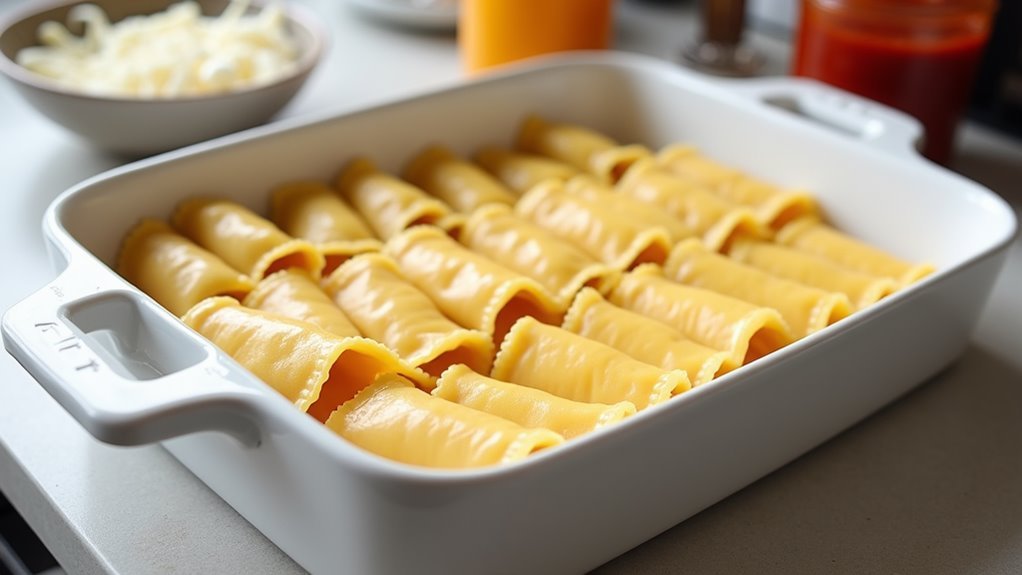
Once your manicotti shells are filled with the cheese mixture, it's time to arrange them in the baking dish.
Picture this: a cozy, inviting dish ready to embrace those cheesy pasta tubes.
Begin by spreading 1 cup of marinara sauce evenly across the bottom of a 9×13 baking dish. This creates a flavorful bed for your manicotti.
Gently place each filled shell side by side in a single layer, ensuring they fit snugly together. Handle them carefully to keep the filling intact.
As you position them, imagine how they'll bake into a cheesy, saucy delight. The anticipation builds as you complete this step, setting the stage for a deliciously satisfying meal.
Get ready, because your kitchen is about to smell amazing!
Step 5. Bake Until Cheese Bubbles
As you slide the prepared dish into the oven, set the temperature to 375°F and let the magic happen. This step is where the true transformation occurs.
As the heat envelops the manicotti, the cheese begins to melt, merging with the marinara sauce. Your kitchen will fill with the irresistible aroma of bubbling cheese and rich tomato sauce.
Keep an eye on the dish as it bakes for about 25-30 minutes. You'll know it's ready when the cheese is golden and bubbling joyfully across the surface.
This is the moment when everything comes together—each bite promises to be delightfully cheesy and satisfying. Let it rest for a few minutes before serving, allowing the flavors to settle perfectly.
Enjoy every cheesy moment!
Final Thoughts
Creating a delicious cheese manicotti doesn't have to be complicated. With just a few quality ingredients and straightforward steps, you can craft a delightful meal that will please everyone at your table.
This easy cheese manicotti recipe showcases the comforting flavors and textures that make it a perennial favorite. Preparing it ahead of time means you can enjoy more time with family and friends instead of being stuck in the kitchen.
As you take that first bite, you'll savor the creamy ricotta filling, perfectly cooked pasta, and bubbling marinara sauce. It's a dish that embodies the joy of homemade cooking.
Frequently Asked Questions
Can the Manicotti Be Frozen for Later Use?
Yes, you can freeze manicotti for later use!
Just assemble the dish without baking it, then cover it tightly with plastic wrap and aluminum foil. Freeze it for up to two months.
When you're ready to enjoy this cheesy delight, thaw it in the fridge overnight.
Bake it straight from the fridge at 375°F for about 40 minutes, or until it's bubbling and golden.
It's a fantastic make-ahead meal that's both convenient and delicious!
What Are Some Good Side Dishes to Serve With Manicotti?
Pairing manicotti with the right side dish elevates the meal to a delightful experience!
Consider a crisp Caesar salad, offering a refreshing contrast to the rich, cheesy pasta.
Garlic bread is another fantastic choice, perfect for soaking up the savory marinara sauce.
Lightly sautéed green beans or roasted vegetables bring balance and color to your plate.
These sides not only complement the main dish but also add variety and texture to your meal.
Enjoy!
How Can I Prevent the Manicotti Shells From Tearing?
You're about to create a delicious manicotti dish, but those pasta shells can be tricky! To keep them intact, don't overcook them—aim for al dente.
Use plenty of water and stir gently to prevent sticking. Cooling them under cold water helps stop further cooking.
When filling, use a piping bag or spoon, and be gentle. This care ensures your manicotti looks as amazing as it tastes, setting the stage for a perfect meal.
Is There a Vegetarian Alternative to the Cheese Filling?
You can make a delightful vegetarian alternative by swapping the cheese filling with a mix of ricotta and spinach.
Just sauté fresh spinach until wilted, then mix it with ricotta, a pinch of nutmeg, and a splash of lemon juice for a zesty twist.
This filling isn't just flavorful but also adds a nutritious element.
It's a simple way to enjoy a classic dish with a fresh, veggie-packed twist!
Can I Use a Different Type of Pasta for This Recipe?
Absolutely, you can switch up the pasta!
Although manicotti shells are traditional, you can use large shells or even cannelloni tubes. Just ensure whatever pasta you choose is sturdy enough to hold the delicious cheese filling.
Cook them al dente, as they'll continue cooking in the oven, absorbing all those wonderful flavors.
This swap might even introduce a delightful twist to the classic dish, making your meal both exciting and satisfying!