Crispy Air Fryer Chicken Strips Recipe You’ll Love
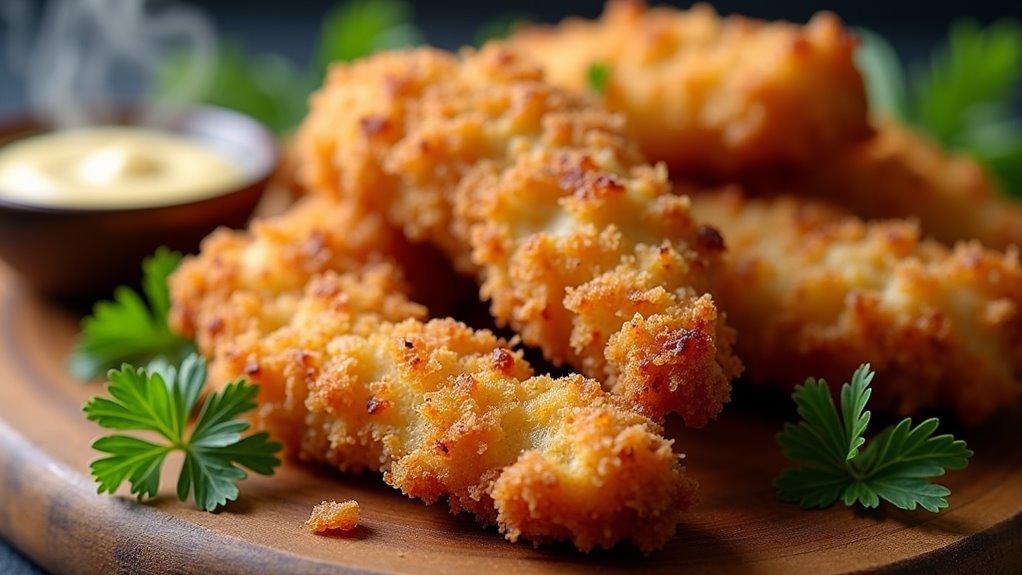
Slice, coat, cook, and savor—each step in making crispy air fryer chicken strips is simple yet rewarding. This recipe offers a crunchy delight that’s less greasy and more wholesome than usual options.
With quick preparation and cooking time, it’s ideal for busy evenings or spontaneous gatherings. The secret to juicy chicken with a golden exterior lies in mastering the art, potentially transforming your weeknight dinners.
Key Takeaways
- Crispy air fryer chicken strips provide a healthier option with less oil and a satisfying crunch.
- Utilize a double coating technique to ensure a golden-brown exterior on the chicken strips.
- Preheat the air fryer to 380°F and cook strips for 12-14 minutes, flipping halfway for even crispiness.
- Serve with dips like ranch or honey mustard and pair with salads for a complete meal.
- Store leftovers in an airtight container for up to three days for easy meal prep.
Recipe
Crispy air fryer chicken strips are a delicious and healthier alternative to traditional fried chicken, providing a satisfying crunch while using less oil. This dish is perfect for quick weeknight dinners or weekend lunches, and it’s sure to be a hit with both adults and children.
The secret to achieving perfectly crispy chicken strips lies in the double coating technique and cooking them at the right temperature in an air fryer. This method ensures a golden-brown exterior while keeping the meat juicy and tender on the inside.
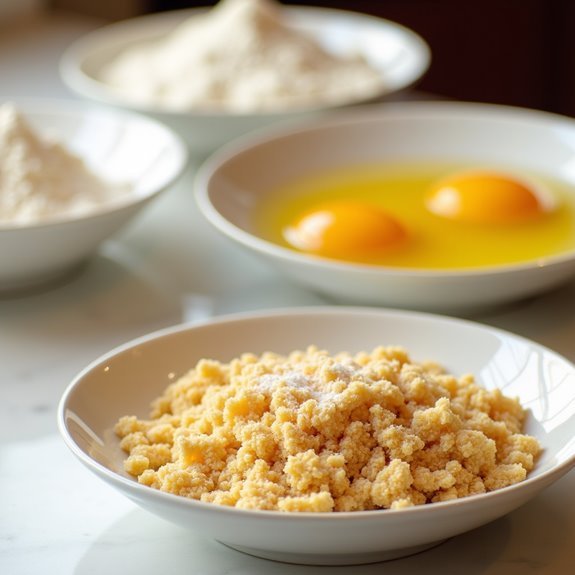
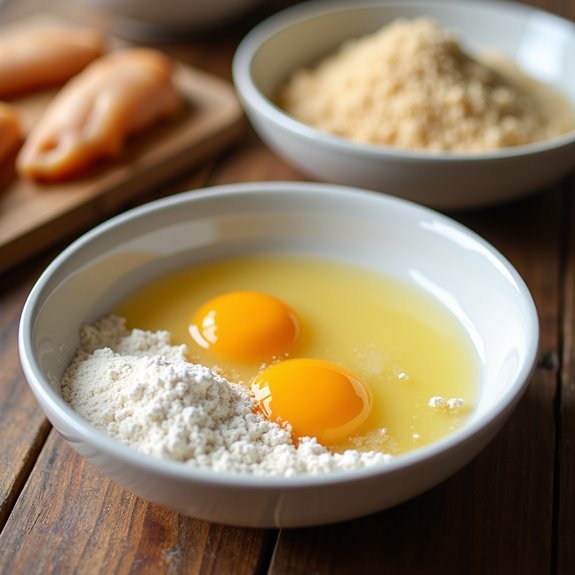
To begin, you’ll need to prepare a breading station with three shallow dishes: one for flour, one for beaten eggs, and one for panko breadcrumbs mixed with salt. The chicken tenderloins are first dipped in flour, then in the egg, and finally coated with the breadcrumb mixture. This double coating is key to creating an irresistibly crispy crust.
Once breaded, the chicken strips are placed in a preheated air fryer, lightly sprayed with cooking spray, and cooked until they reach the desired level of crispiness.
Ingredients:
- 1 pound chicken breast tenderloins
- 1 cup all-purpose flour
- 2 large eggs
- 2 cups panko breadcrumbs
- 1 teaspoon salt
To cook, preheat your air fryer to 380°F (193°C). After preparing your chicken strips with the breading method, arrange them in the air fryer basket, making sure not to overcrowd it to allow for proper air circulation.
Lightly spray the strips with cooking spray and cook for 12-14 minutes, flipping halfway through the cooking time. The strips are done when they’re golden brown and the internal temperature reaches 165°F (74°C). Let them rest for a few minutes before serving to ensure they stay crispy.
For extra tips, remember not to overcrowd the air fryer basket, as this can prevent your chicken strips from getting crispy. If you’re making a large batch, keep the cooked strips warm in an oven set to 200°F (93°C) while you finish cooking the rest.
Store leftovers in an airtight container in the refrigerator for up to three days, and reheat them in the air fryer for a few minutes to restore their crunch.
Cooking Steps
You’re in for a treat with these crispy air fryer chicken strips!
First, slice the chicken into even strips, then set up your breading station with flour, beaten eggs, and panko breadcrumbs mixed with salt.
Coat each strip thoroughly, preheat your air fryer to 380°F, and cook them for 12-14 minutes, flipping halfway through, until they’re perfectly golden and deliciously crispy!
Step 1. Slice Chicken Into Strips

Begin by ensuring your chicken breast tenderloins are ready for slicing. This is where the fun begins!
Grab a sharp knife and lay each tenderloin on a cutting board. Now, carefully slice them into even strips, about 1-inch wide. Keeping the strips uniform ensures they cook evenly and achieve that perfect crispiness you’re aiming for.
Feel the excitement as you transform these tenderloins into the beginnings of a delicious meal. Take your time, and remember, precision is key.
As you slice, imagine the golden, crunchy finish that awaits you. This step is crucial; it’s the foundation of your soon-to-be irresistible chicken strips.
With each cut, you’re one step closer to a delightful and healthier homemade treat. Enjoy the process!
Step 2. Prepare Breading Station Setup
With your chicken strips ready, it’s time to set up the breading station. This is where the magic begins!
Grab three shallow dishes to get started. In the first dish, pour in the all-purpose flour. This step creates a base for the coating to stick.
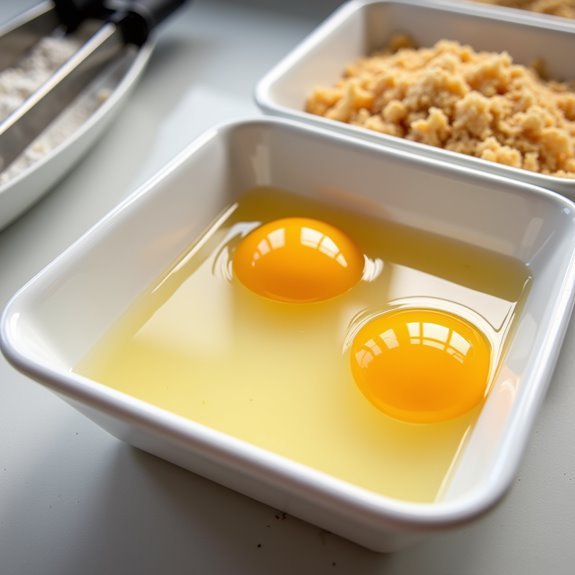
Next, crack the eggs into the second dish, whisking them until smooth. The eggs act as a glue, helping the breadcrumbs adhere perfectly.
Finally, in the third dish, mix the panko breadcrumbs with salt, ensuring every bite is flavorful.
Organize your dishes in a neat line to make the process seamless. This setup is essential for achieving that irresistible, crispy texture.
Get ready to transform your kitchen into a hub of delicious creation!
Step 3. Coat Strips With Breadcrumbs
To start coating your chicken strips with breadcrumbs, take each piece and dip it into the flour, ensuring a light, even coating. This step is crucial for creating a base that helps the egg adhere better.
Next, submerge the floured strip into the beaten eggs, letting any excess drip off. Feel the anticipation as the egg clings to the chicken, ready to catch the crispy goodness of the breadcrumbs.
Now, it’s time for the final touch. Roll the strip in the panko breadcrumbs mixed with salt, pressing gently to ensure they stick. This layer is where the magic happens, promising that satisfying crunch.
As you coat each strip, imagine the delightful crispiness you’re about to achieve. You’re on your way to creating a mouthwatering masterpiece!
Step 4. Preheat Air Fryer to 380°F
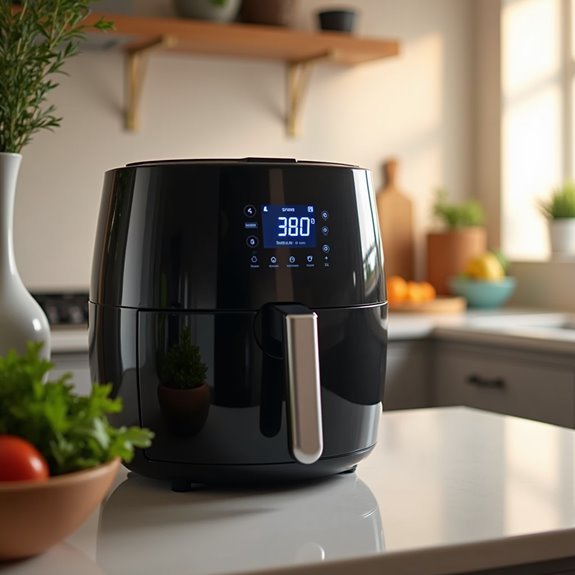
Fire up your air fryer to 380°F to kick off the cooking process. This crucial step ensures your chicken strips turn out perfectly crispy and delicious.
By preheating, you’re setting the stage for even cooking, helping those tasty coatings adhere firmly and develop that coveted golden-brown crunch.
Don’t skip this step; it’s as important as any other. As your air fryer warms up, take a moment to appreciate how this simple appliance is about to transform your dinner game.
You’ll love how fast and easy it’s to achieve that deep-fried texture without the oil. Preheating not only boosts flavor but also ensures your chicken remains juicy on the inside.
Get ready for a delightful meal that’s healthier and quicker!
Step 5. Cook Strips for 12-14 Minutes
Once your air fryer is preheated to 380°F, it’s time to cook those perfectly breaded chicken strips.
Place the strips in the air fryer basket, ensuring they’re in a single layer to allow even cooking. Lightly spray them with cooking spray for that golden, crispy finish.
As you start the timer for 12-14 minutes, feel the anticipation build! Halfway through, carefully flip each strip using tongs to ensure both sides achieve that irresistible crunch.
Check the internal temperature; it should reach 165°F. As you pull them out, their golden-brown perfection will amaze you.
These juicy, tender strips are a feast for the senses, promising the satisfaction of a restaurant-quality dish right in your kitchen. Enjoy the deliciousness!
Final Thoughts
Embrace the ease and satisfaction of making crispy air fryer chicken strips right in your own kitchen.
You’ll love how simple it’s to achieve that golden-brown, crunchy exterior while keeping the meat tender and juicy. With just a few ingredients and a straightforward method, this recipe transforms your weeknight dinners into a delightful culinary experience.
Don’t hesitate to experiment with spices and dips to make these strips your own. The air fryer allows you to enjoy all the flavor and crunch without the guilt of deep frying.
Perfect for sharing with family or friends, these chicken strips are sure to be a hit. Give it a try, and you’ll see just how rewarding homemade comfort food can be.
Frequently Asked Questions
Can I Use Gluten-Free Flour and Breadcrumbs?
Absolutely, you can use gluten-free flour and breadcrumbs!
Did you know that nearly 3 million Americans are gluten intolerant? This makes gluten-free alternatives a game-changer for many.
By simply swapping out traditional flour and breadcrumbs with gluten-free versions, you’re still on track for delicious, crispy chicken strips.
The process stays the same: coat, air fry, and enjoy. You’ll achieve that same golden crunch while keeping your meal gluten-free and satisfying.
Enjoy your cooking adventure!
How Can I Add Different Flavors to the Chicken Strips?
You can easily jazz up your chicken strips by adding different flavors to the breading!
Mix spices like paprika, garlic powder, or cayenne pepper into the flour or panko for a kick.
Want something zesty? Incorporate lemon zest or Parmesan cheese into the breadcrumbs.
For a touch of sweetness, try adding a bit of honey or maple syrup to the eggs.
Get creative, and taste the delightful variety in every bite!
What Dipping Sauces Pair Well With These Chicken Strips?
Your taste buds will do cartwheels when you pair these chicken strips with honey mustard, BBQ sauce, or ranch dressing!
Each sauce brings its own unique twist, enhancing the crispy delight of the strips. Honey mustard adds a sweet and tangy kick, BBQ sauce offers a smoky flavor, and ranch provides a creamy, herby contrast.
Is It Possible to Use Chicken Thighs Instead of Breast Tenderloins?
Absolutely, you can use chicken thighs instead of breast tenderloins!
Thighs offer a juicy, flavorful twist, perfect for those who love a richer taste. Just cut them into similar-sized strips, ensuring they cook evenly.
Follow the same double-coating method and air fryer steps for that irresistible crunch. The result will be tender, mouthwatering strips that are sure to impress your taste buds and make your meal unforgettable!
How Can I Prevent the Breadcrumbs From Falling Off?
To keep breadcrumbs from falling off, ensure each chicken strip is dry before breading. Pat them with paper towels, then dredge in flour, ensuring full coverage.
The flour creates a base for the egg to stick, while the egg helps the breadcrumbs adhere. Press the breadcrumbs firmly onto the chicken, and let them sit for a few minutes before cooking.
This extra time helps everything set, ensuring delicious, crispy results every time!